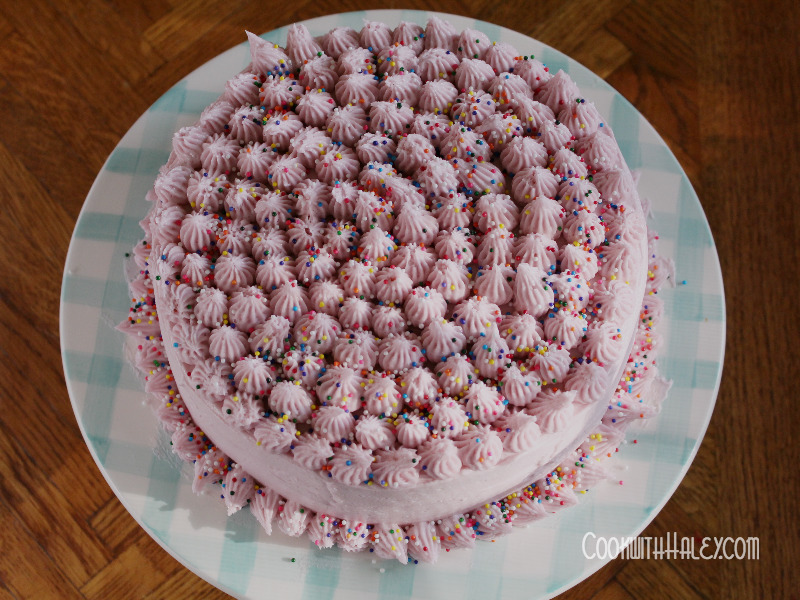
http://ashmann.uk/trips-and-whatnot/john-ogroats-almost-lands-end/ There are few things more impressive than a beautifully crafted layer cake embellished with frosting rosettes, fresh fruit, and flowers. Even an eight inch layer cake can be a enough to stop appreciative guests and party goers in their tracks, with mouths agape and eyes in awe.
If you’re just joining us you’re reading Part 3 – Layered, Not Stirred, of my three post series, The Great Cake Experiment. Check out Part 1 – The Perfect White Cake and Part 2 – Buttercream Bonanza.
Your cakes have cooled, your buttercream is whipped, and you’re ready to begin assembling your layer cake. It’s just a matter of slapping some frosting up there and hoping your life’s masterpiece will emerge in the form of a cake, right? Whoa! Slow down there, Sparky!
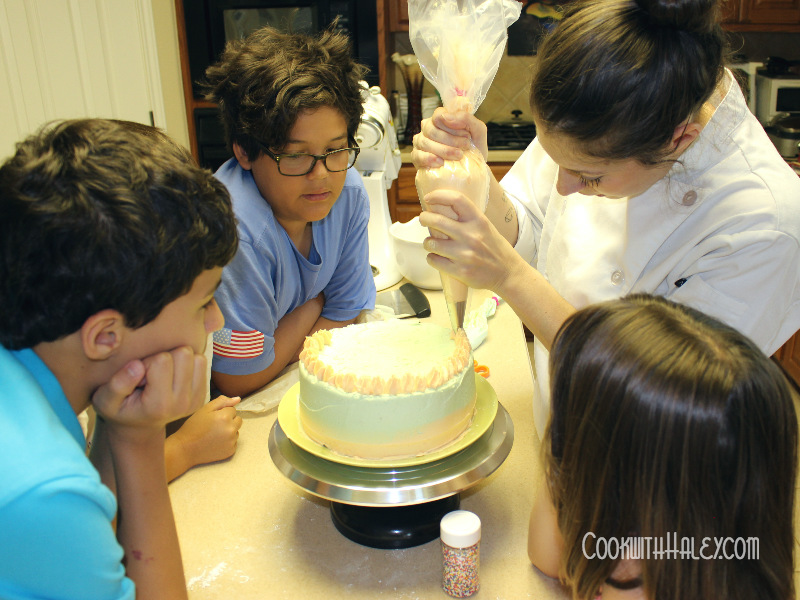
Before you start assembling your cake make sure you have all of your supplies handy. You’ll need your buttercream frosting, piping bags, rotating cake stand, bench scraper, large and small offset spatula, a small bowl for excess frosting, pastry tips, other cake decorating items (SPRINKLES, fresh fruit, fresh flowers, etc), and a cake leveler.
A cake leveler consists of a thin wire stretched across a large bracket shaped metal handle and is used to cut the dome off the top of a cake or to cut a cake in half along it’s equator. I hear what you’re thinking, “Awe come on, do I really have to buy some fancy uni-tasker to make my cake level?” No, you don’t, but this little gizmo will save you time and headaches if you plan to bake and decorate cakes with any sort of frequency (ex. birthdays, holidays, Tuesdays). At $3.00 this was an easy investment for me to justify.
Anatomy of a Layer Cake
Now that your cakes are leveled and cut in half (if you’re going for four layers) let’s talk about the anatomy of a layer cake. Layer cake assembly generally consists of four parts:
- The filling
- The crumb coat
- The exterior coat
- The decoration
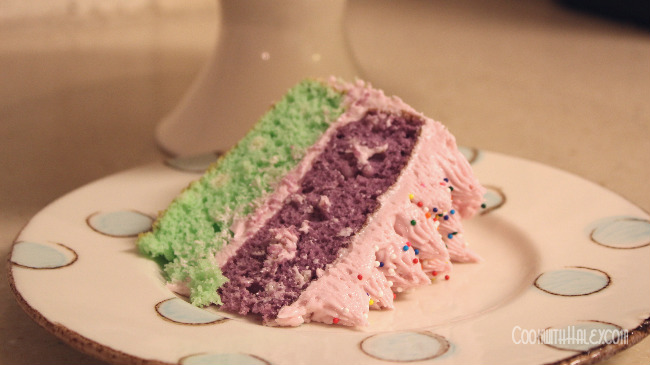
Cake Filling
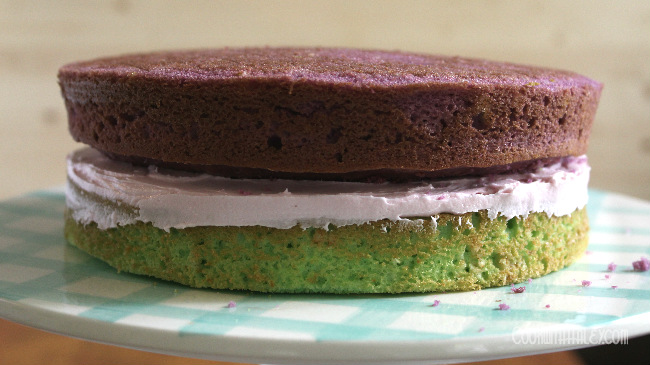
Filling refers to whatever you choose to put in between each layer of cake. Guys, I like the taste of buttercream (a lot) and I also like to keep things simple, so I decided to use buttercream as my cake filling.
The amount of filling is determined by how tall you want your cake to be and how much filling you want to make in advance. For a thin layer of filling I use about 1/2 cup of buttercream. You can use up to about one cup of buttercream between each layer. Keep in mind the more buttercream between the layers the more risk of cake slide (where the top layers slide clean off the cake) so keep your cakes cool.
Place a cardboard cake round on top of your cake stand and place one layer of cake on top of the round. Pro tip: If you have already chosen your serving vessel place it on top of the rotating cake stand and assemble the cake right on it. This might mean you have a regular cake stand on top of a rotating cake stand…just be cautious.
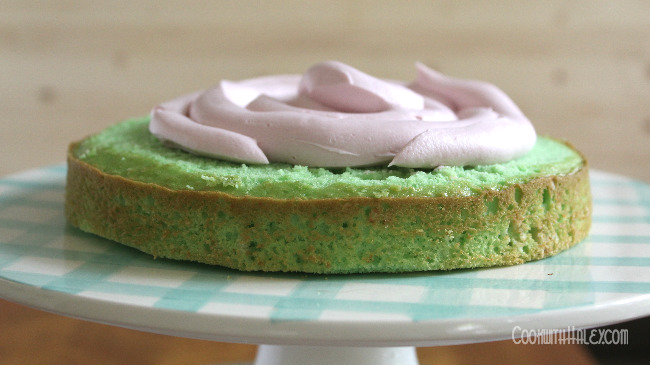
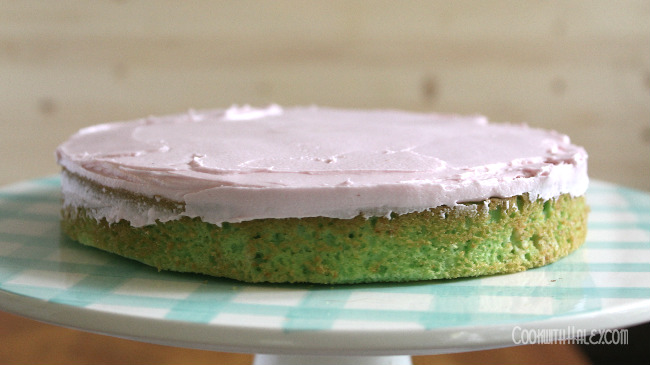
Pipe your buttercream filling on top of the layer and spread it evenly into about 1/8 inch to 1/4 inch thickness. Let that luxurious excess buttercream spill down the sides of the cake to be used in your crumb coat later. Try to resist eating it all. Repeat this process for each layer.
When it comes to filling you have more options in addition to buttercream. Consider using fruit fillings, pastry cream, chocolate ganache, lemon curd, cream cheese frosting, or chocolate mousse.
Crumb Coat
Now that your favorite filling is delicately sandwiched between your cake layers your next step is to apply a crumb coat. A crumb coat is a thin coat of frosting around the outside of the cake. Acting as a sort of frosting primer, the crumb coat keeps stray crumbs within it’s layer instead of mixing in with the exterior coat. It also adds a bit of texture to help the exterior coat adhere to the cake.
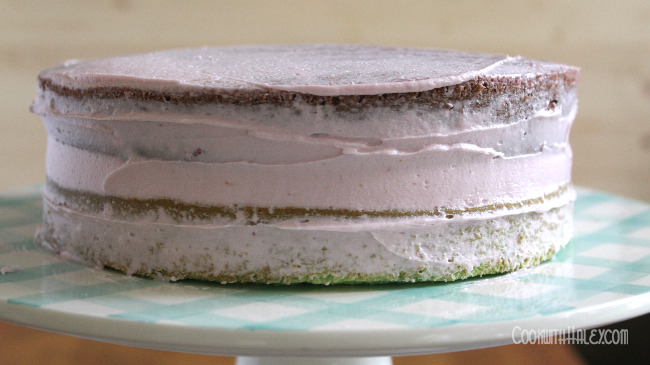
Pipe about 1 cup of buttercream on the top of the cake, spread it out in a thin layer (about 1/4″ thick) using an offset spatula, and let any excess spill over the sides of the cake. If your frosting is stiff enough, the excess will sort “float” over the sides of the cake. That’s totally okay, at this point it doesn’t have to flow down the sides. You will take care of the excess later.
Fill large gaps between the cakes by piping buttercream into them. Spread excess buttercream evenly around the cake with an offset spatula. The crumb coat should be thin enough for you to see the cake peaking through.
If time allows, refrigerate the cake after applying the crumb coat for about 30 minutes to solidify everything a bit.
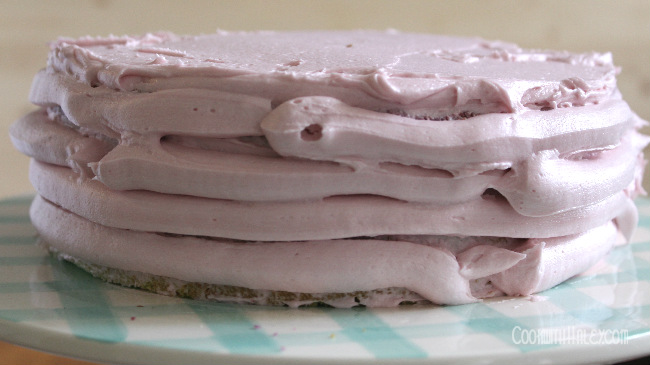
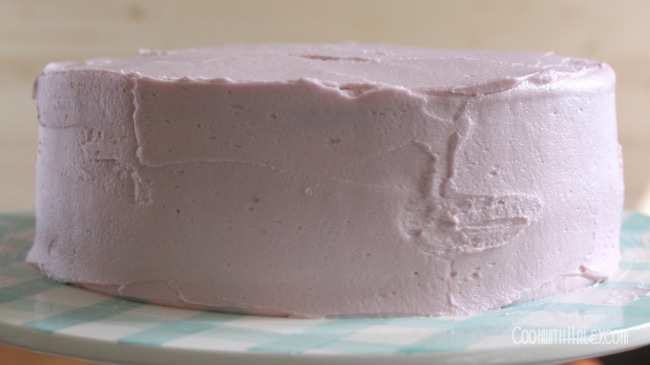
Exterior Coat
After your cake is filled, crumb coated, and chilled you can apply your exterior coat. Using your rotating cake stand, pipe thick bands of frosting, layered on top of each other, around the entire cake. The cake will look a bit like a piece of unfinished pottery waiting to be molded into something beautiful.
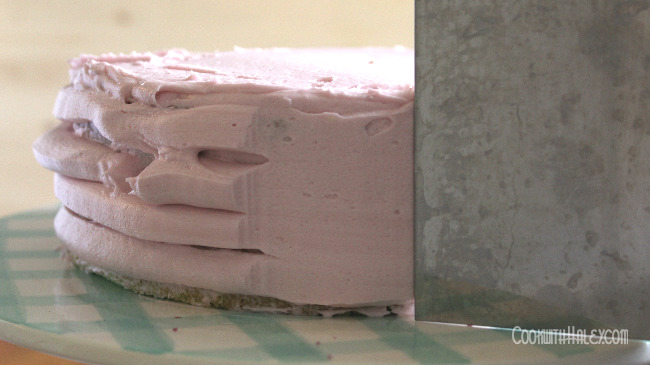
To smooth out the frosting, hold a bench scraper upright against the cake and perpendicular to the cake stand. With even pressure and speed, turn the cake stand as you drag the bench scraper against the side of the cake in the opposite direction. Try to complete a full rotation in one turn.
Scrape the excess buttercream into your bowl. Go back and fill in any gaps using an offset spatula.
For a soft transition between two colors, use the same thick bands piping technique around the entire cake, but pipe bands of the first color on the bottom half of the cake and bands of the second color on the top half. Smooth the frosting out using the same bench scraper method.
Smooth out the frosting on the top of the cake by pulling excess frosting toward the center using the edge of an offset spatula. Then smooth the top out using the bottom of the spatula. Refrigerate the cake for 30 minutes before adding more decorations.
Decoration
Now that your cake is completely frosted you can let your creativity soar. Decorate this baby any way you want. There are so many possibilities, from neat and tidy frosting roses and messy frosting ribbons, to sprinkles, to fresh fruit, to fresh flowers, to candy. Don’t limit yourself by requiring your cakes to be perfect every time, or even the first time, for that matter. Remember when I started this project I told you I’m not a baker, but I gave it a shot!
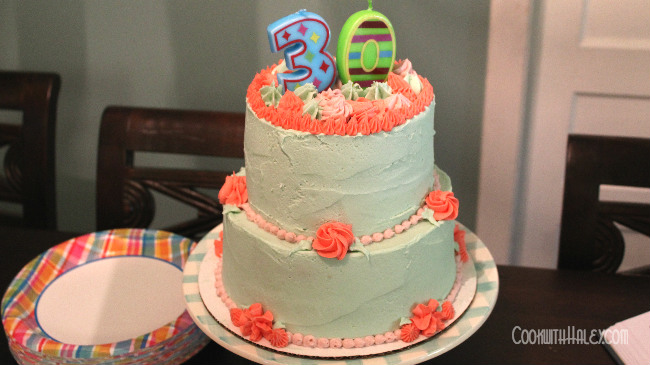
It may not be absolutely perfect, but it’s buy Lyrica belfast your creation. It was just flour, eggs, milk, and sugar and you’ve turned it into something delicious and beautiful that will warm someone’s heart. Maybe there are some imperfections, just pipe pretty little frosting things over them or strategically place a flower in that spot, or just leave them as they are. Embrace and love the imperfections. As Bob Ross says there are no mistakes; just happy accidents.
Enjoy!